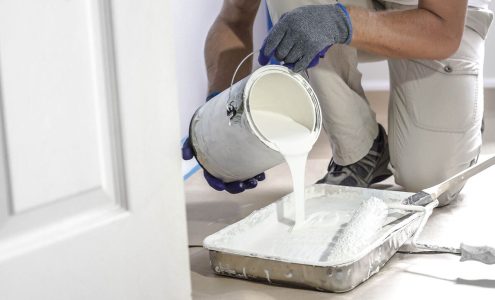
The quality of surface preparation on new or repaint surfaces, significantly affects the number of hours that will be required prior to painting. The first step should always be a thorough examination or agreement of the substrate acceptable standard.
The following will provide some guidance in terms of preparation
| New Plaster | Ensure the plasterboard is fixed and jointed correctly. There are a set of standards known as Plasterboard Levels of Finish (AS/NZ 2589 2007) The most common is level 4, referred to as ‘paint ready’ finish for low sheen or flat paints in a non-critical light area. Ensure the surface is dust free. After the joints and screw heads are stopped, sand the plasterboard using 220 grit sandpaper. Ensure gaps between skirting boards and frames are filled. |
| Loose & Peeling Paint | Remove as much loose and peeling paint by scraping, wire brush or power-washing the surface. Feather-sand rough edges smooth until they blend with bare surface |
| Dirt Grease Oil Chalk and deposits | Remove deposits by washing with a detergent solution or commercial cleaner recommended for cleaning painted surfaces using a sponge or brush. After washing, thoroughly rinse with clean water and allow to dry. Power-washing is also a fast, effective method of removing dirt, chalk, etc. |
| Mould | Mould must be killed and removed before repainting. If the mould is not completely removed, the active spores will continue to grow and may almost immediately begin to reappear on a recently repainted surface. |
| Rust | Remove all rust by mechanical means such as wire brushing, steel wool and sandpaper. |
| Glossy Surfaces | Always dull surfaces with sandpaper |
| Previously Coated Surfaces | Check compatibility of previously painted surfaces. If there is any doubt complete a test patch. |
| New Aluminium and Galvanised | Start by solvent cleaning (with mineral spirits) to remove any oily residue. Prime with a good quality primer formulated for these surfaces (etch primer). In the case of Galvanised surfaces, a minimum of 4 months exposure to the elements is preferable. |
| Copper | Clean free of dirt, oxides and foreign matter. Acid etching may be required to remove oxidation. Prime with an oil-based coating. |
| Brass & Bronze | Remove only loose tarnish, but not all tarnish needs to be removed. Then wash with detergent to get rid of dirt and grease. Rinse well and allow to dry. Prime with a top-quality oil metal primer. |
| Chrome | Rough up the surface with fine sandpaper. Wash with soap and water, then rinse and allow to dry. Prime with oil-based metal primer |
| Iron Steel & Ferrous Metal | New: Wipe clean with mineral spirits to eliminate any oil or grease. Remove all rust and mill scale. Prime with a good oil-based metal primer.
Previously Coated: If the old film is in good sound condition, de-gloss the old surface with light sanding and clean with mineral spirits. If the old film is in poor condition, remove all rust by mechanical means such as wire brushing, prime all bare spots with a corrosion resistant primer |
| Stainless Steel | Wash to remove grease with a detergent solution. Sand lightly to etch the surface. Prime with epoxy metal primer. |
| New or Unpainted Concrete Floors | Check for any dampness on floors. New concrete should be allowed to cure 30 days at 20ºC prior to painting. All concrete surfaces should be etched before painting. Allow surface to dry completely. Concrete can also be prepared for painting by lightly sandblasting. |
| Painted Concrete | Be sure surface is free from dirt, dust, etc. by sweeping or vacuum cleaning. Remove grease, oil, floor compound and wax by chemical cleaning. Scrape carefully to remove deteriorated coatings. If remaining coating is glossy or very hard, sand it lightly for good adhesion of subsequent coatings. The surface must be thoroughly dry before coating. |
| Masonry | If efflorescence or cement dust is present on masonry and concrete, it should be removed by etching. Flush off surfaces after etching, with clean water and allow to dry. If etching is not possible; sand, scrape and wire brush. Surfaces should also be free of all dust, dirt and loose materials. Latex or membrane finishes will afford best results. |
| Glazed Surfaces | Wash with detergent, then roughen surface with sandpaper. Paint with a good quality 2-part epoxy paint. |
| Unpainted Exterior Wood Surfaces | Should be clean and dry. Prime and paint as soon as possible. All nail holes or small openings should be filled after the priming coat is applied. Prime with a high-quality oil or latex primer. |
| Asbestos Lead & Hazardous substrates | Where hazardous substrates are present, specialised techniques and processes must be adopted to manage the risks associated with the project. In each circumstance, specialised Protective clothing must be worn to carry out the work. |
| Acoustic Tiles | Should be well cleaned before painting. Finish with flat wall or ceiling latex to retain acoustics. Spraying is the best way to paint these surfaces. |
| Woodwork Interior | All finishing timber and flooring should be sanded smooth, with the grain not across it. Surface blemishes shall be corrected. Paint using an oil-based enamel undercoat. |
| Wallpaper | Remove loose paper. Test for bleed by applying latex to a small area to make sure wallpaper is water fast. If bleed occurs, seal paper with one coat of white shellac reduced with an equal volume of alcohol. Avoid skips when applying shellac. Allow to dry one hour before top coating. |


